VADV32 | Download | Documentation | Support
Setup From Scratch

This document contains 
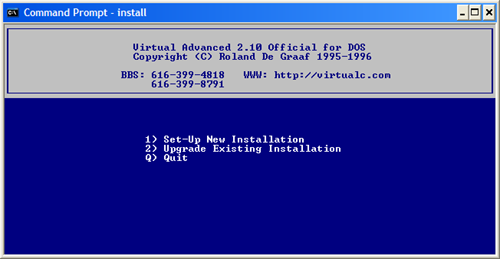
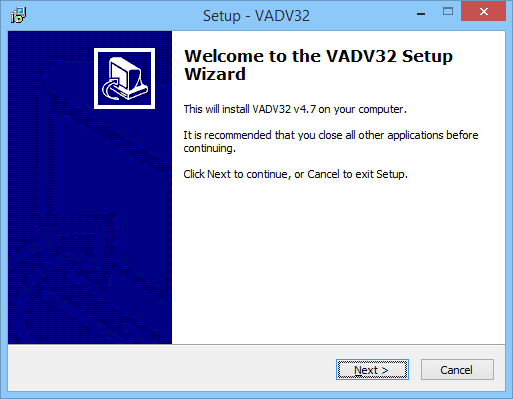
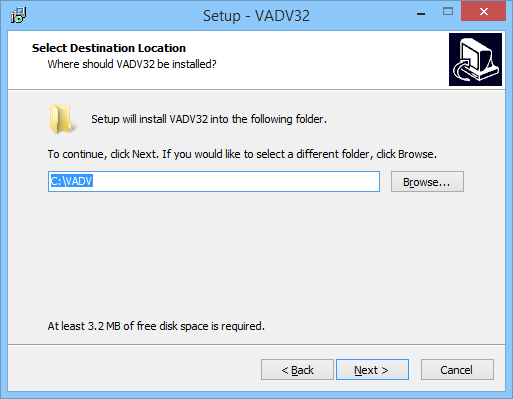
step-by-step instructions for installing Virtual Advanced BBS and VADV32 from scratch. This will NOT cover anything other than what is needed to setup a functioning telnet 
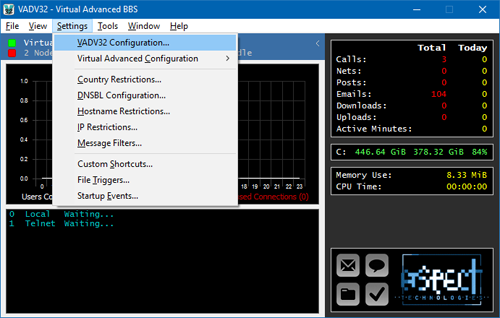
BBS. For information about configuring and customizing your BBS, see the VADV documentation.

You will need to download the latest VADV and VADV32 software before continuing.

Notice: If you are installing on Windows 10, read the Windows 10 Tips page before proceeding.

Virtual Advanced Installation (Win32 Package)

It is recommended that you install Virtual Advanced using the Windows installer. If you prefer to use the DOS installer, then goto the next section. Please note that the Windows installer is only for new installations. Upgrading from an earlier version of VBBS or VADV will require you to use the DOS installer.

  1. Unzip VA210W32.ZIP into an empty directory.
  2. In the directory you extracted the files, run SETUP.EXE. This will launch the Virtual Advanced installer.
  3. You are now viewing the main installer window. Click "Next" to continue...
  4. The next window displays any important installation notes. Please take the time to read this before continuing. When finished, click "Next".
  5. You now must choose the directory to install VADV into. It is recommended that you install into "C:\VA" or the equivalent on another drive. It is highly recommended that you choose a directory off of your root directory since there is a limit on the length of paths within the software.
  6. The installer now shows a summary of what you have chosen. If the information is correct, then click "Install" to begin the installation. The installation will take a few seconds to complete.
  7. When it has completed, it will show a final window. This concludes the VADV installation.
Virtual Advanced Installation (DOS Package)

This is for installing the DOS package of Virtual Advanced. It is recommended that you use the Windows installer instead. If you installed using the Windows installer, then skip this section.

  1. Unzip VA210.ZIP into an empty directory.
  2. Load a DOS window by clicking on Start, selecting Run and typing "CMD". Press enter. Change to the directory that you extracted the files into.
  3. In the directory you extracted the files into, run INSTALL.EXE. This loads the VADV installer.

  4. Press "1" for a new installation. It will now ask you for the directory to install VADV into. By default the directory is "C:\VA", but you may change it to whatever directory you wish. Bare in mind that the directory should be off of your root directory and be eight characters or less.
  5. VADV will now copy the files and setup the directory structure. When it has finished, it will display a message and return you to DOS.
  6. Copy your VADV registration file (PROD3.ID) to your Virtual Advanced DATA directory. If you have a VISK registration then copy its registration file (PROD5.ID) to your Windows directory.
  7. This concludes the DOS VADV installation.
VADV32 Installation

VADV32 installation is done by a Windows installer which makes it easy to install:

  1. Unzip VADV32_2.x.ZIP into an empty directory.
  2. You may wish to review the README.TXT file that is included in the package before continuing. This file contains any important installation information.
  3. In the directory you extracted the files, run SETUP.EXE. This will launch the VADV32 installer.

  4. You are now viewing the main installer window. Click "Next" to continue...
  5. This brings up the license agreement. If you agree with the license, then click on "I accept the agreement", then click "Next". If not, then click "Cancel", then click "Yes" to exit setup. Then remove any copies of VADV32 from your hard drive.
  6. The next window displays any important installation notes. Please take the time to read this before continuing. When finished, click "Next".
  7. You now must choose the directory to install VADV32 into.


    YOU MUST INSTALL VADV32 INTO YOUR MAIN VADV DIRECTORY. It defaults to "C:\VA". If this is not your VADV directory, then choose "Browse" and select your VADV directory. Click "Next" to continue.
  8. It now asks what Start Menu folder to put the VADV32 icons. Just click "Next".
  9. The installer now shows a summary of what you have chosen. If the information is correct, then click "Install" to begin the installation. The installation will take a few seconds to complete.
  10. When it has completed, it will show a final window. It has the option to run VADV32, make sure it is checked and click "Finish". This concludes the VADV32 installation.
Configuration

You now have VADV and VADV32 installed. Once you run VADV32, your system will accept one telnet connection. You probably want to add more:

  1. If VADV32 is not loaded, then load it from the Start Menu.
  2. You should now see the main VADV32 window.


    At the top, click on "Settings", then click "VADV32 Configuration".
  3. You now see the options available for VADV32.


    You will only need to change the number of telnet nodes. Change it to "10" to allow ten telnet connections. The other options can be changed to suit your needs. See another section of the VADV32 documentation on what they do. Click "OK" when you are done.
  4. This concludes the installation and configuration. You should now be able to telnet into your BBS!
Home : News : Products : Downloads : Community : VirtualNET : Development : Support : About : Contact : Bug Reporting